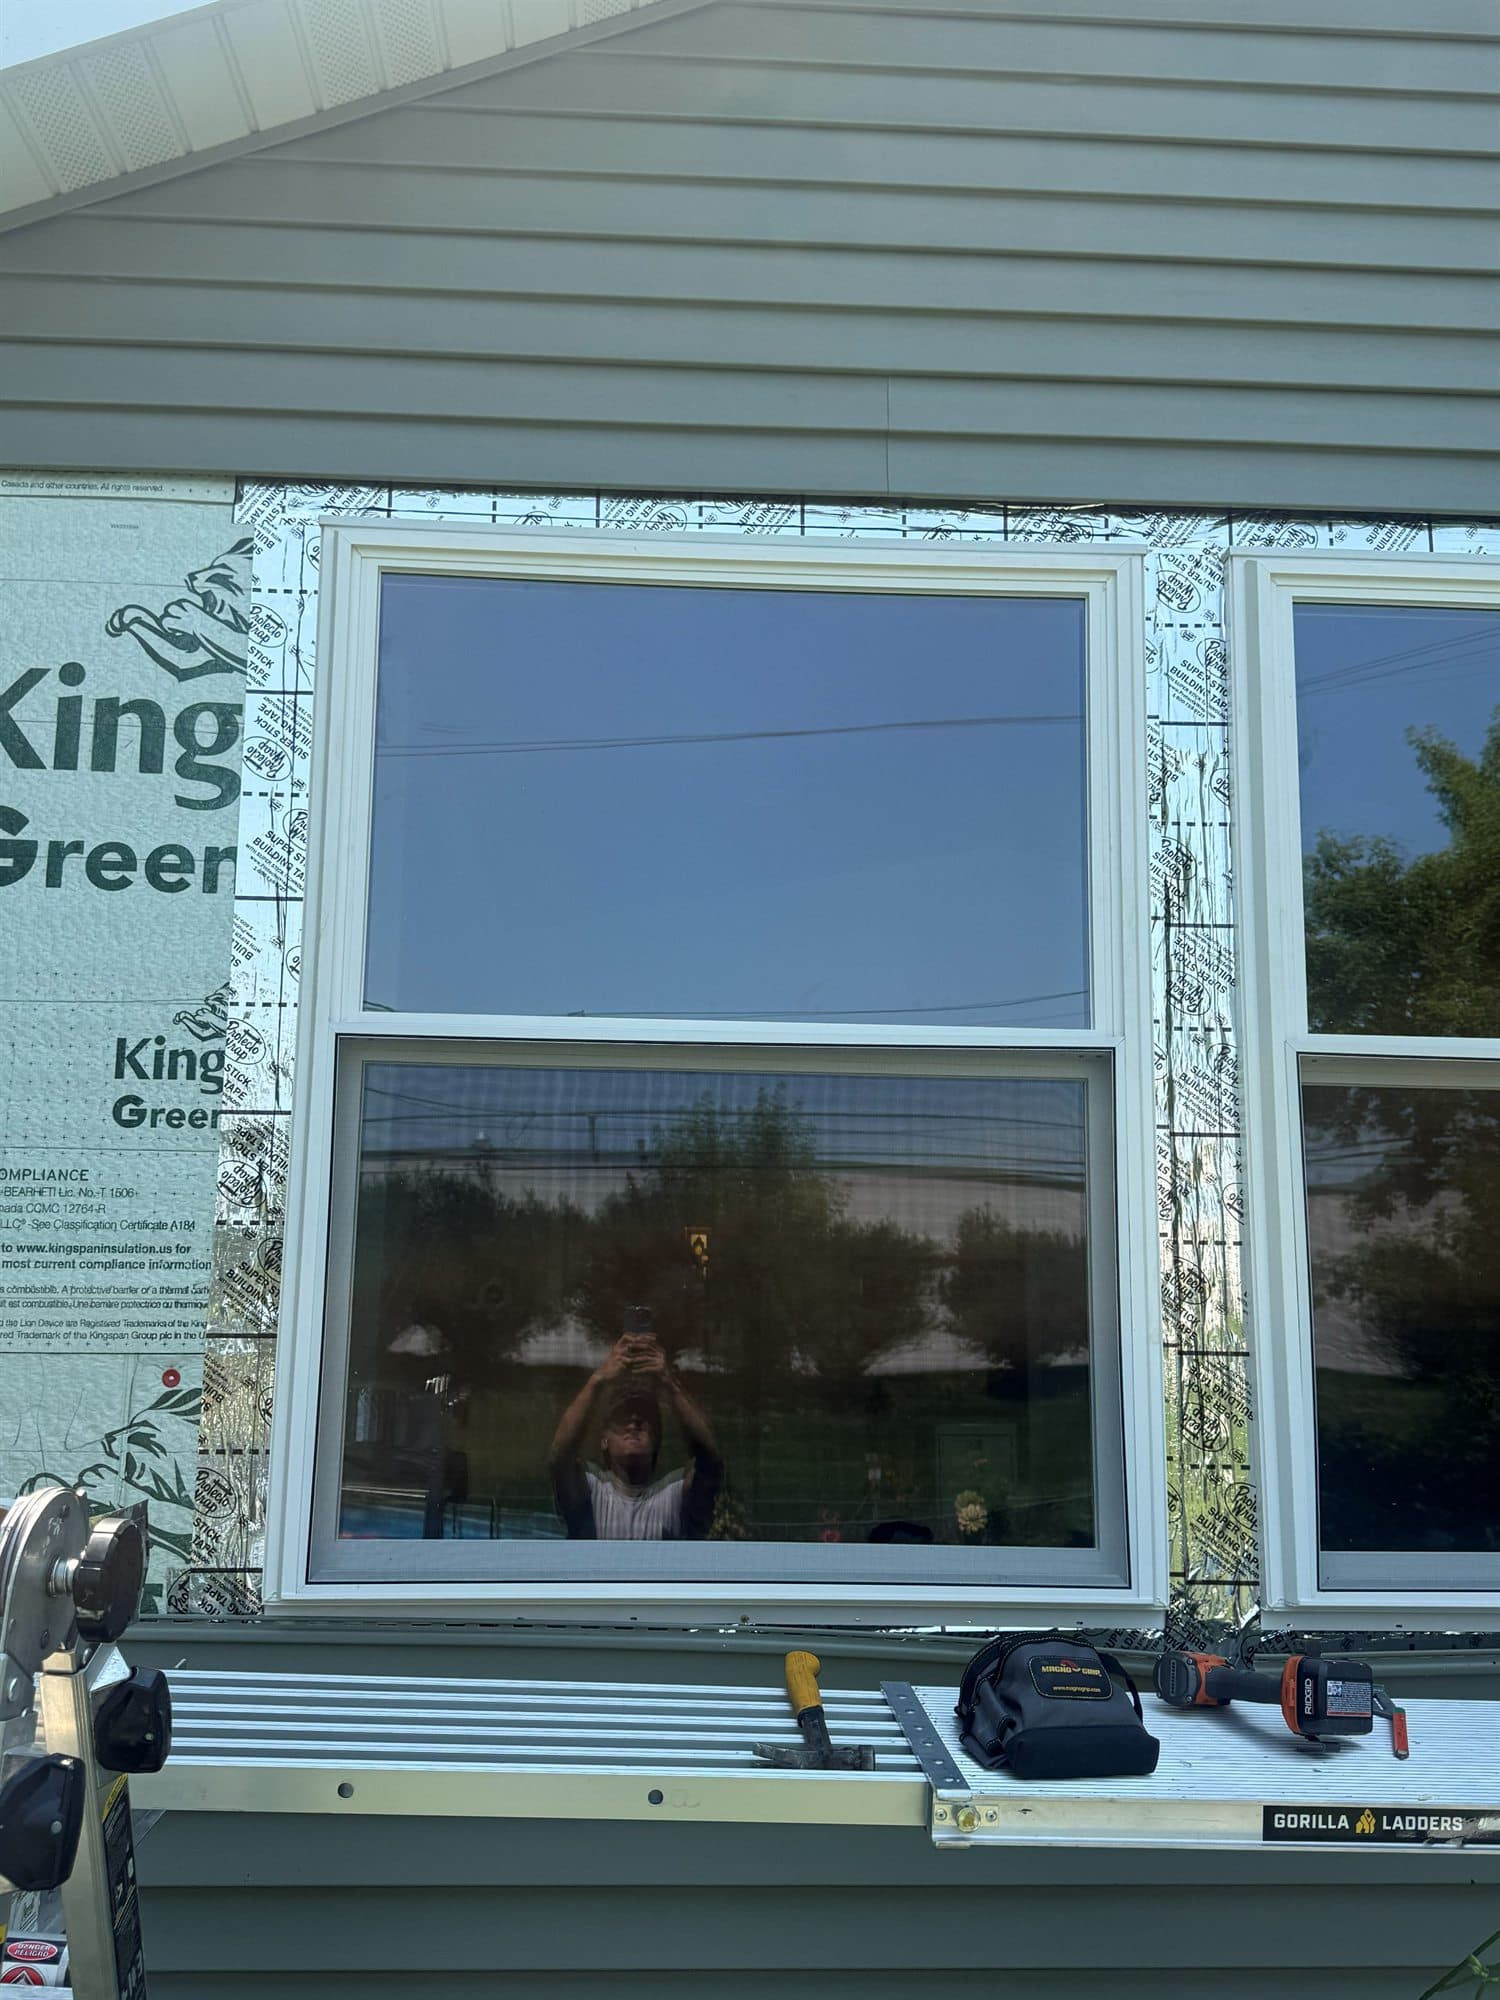
Flashing a flanged window in a wrapped wall goes in this order: cut the WRB in a modified I and fold the head flap up, build a sloped sill pan with a back dam, seal the jambs and head flange, set the window, tape the jambs, tape the head over them, fold the WRB flap down over the head tape, foam the interior gap and seal it to the drywall.
That is the whole order. What follows is why each step is where it is, what a crew gets wrong under schedule pressure, and what the building code actually requires. It is written for GCs and superintendents in the Twin Cities who want to spec the install and check it on a walk-through, and for the crews doing the work.
What is the correct flashing sequence for a flanged window?
Start to finish, one opening:
- 1Check the rough opening: plumb, level, square, right size for the unit plus shim space.
- 2Cut the WRB: a horizontal cut across the head, a vertical cut down the center, and horizontal cuts at the sill (the modified I). Cut 45 degrees up and away from each top corner so the head flap folds up. Fold the side and sill flaps into the opening and fasten; tape the head flap up out of the way.
- 3Build the sill pan: slope it, add the back dam, install formed, flexible or site-built pan flashing with end dams up the jambs. The front edge of the pan laps over the WRB below the opening.
- 4Apply sealant to the back of the flange, or to the wall, at the jambs and the head only.
- 5Set the window in the pan, shim, check plumb, level, square and reveal, and fasten through the flange per the manufacturer's spacing. Check operation before the tape goes on.
- 6Tape the jamb flanges, covering the flange and the ends of the sill pan.
- 7Tape the head flange, running past both jamb tapes.
- 8Fold the WRB head flap down over the head tape and tape the two diagonal cuts.
- 9Inside: low-expansion foam or backer rod in the gap, then a continuous sealant bead between the frame and the interior finish.
How should the WRB be cut at the opening?
The modified I-cut leaves a head flap that folds up and stays attached to the wrap above the window. That flap is what later laps over the head flashing and makes the window part of the drainage plane. The 45-degree cuts at the top corners give the flap room to fold up and give the head tape a clean surface to bond to without cutting into the WRB above.
An X-cut is faster and it is wrong. The two top triangles of an X fold outward, and once the window is in, anything that gets behind the wrap above the window is directed by those triangles straight into the framing. Crews who learned on X-cuts do not see the problem because the leak shows up years later and somewhere else.
Self-adhered WRBs and fluid-applied membranes change the tools, not the logic. There is still a rough-opening treatment, still a pan, still a head detail that drains onto the flashing. Follow that manufacturer's opening detail; it is what the inspector and the warranty will refer to.
How is the sill pan built?
The rough sill gets slope first. A strip of beveled siding nailed thick edge to the interior does it, or a formed pan with slope built in. ASTM E2112 calls for a sloped pan on sills deeper than 6 inches, which on a 2x6 wall is every sill. The back dam is a strip of wood or the molded lip of a formed pan along the inside edge, and end dams turn up at each jamb. Both are at least 2 inches under E2112.
Three pan types are in common use, all acceptable under E2112. A formed rigid pan (PVC or metal, one piece or sealed corners) gives the most consistent geometry and stands up to heavy units. A flexible self-adhered pan (rubberized asphalt or butyl, formable at the corners) conforms to an imperfect sill and is what most production crews carry. A site-built pan is beveled siding, a wood back dam, and membrane over the whole thing.
Whichever pan, its front edge has to lap onto the WRB below the opening. Leave roughly 2 inches of pan or flashing hanging past the face so it can be folded down and adhered to the wrap. If the sill flap of the WRB was folded into the opening, the pan goes over it, not under it.
Where does the sealant go, and how are the tapes applied?
A continuous bead on the wall (or the back of the flange) at the two jambs and the head. Nothing at the sill. The unsealed sill flange is the weep: any water that reaches the pan drains out the bottom of the flange. Crews who run sealant around all four sides have built a bathtub with a window sitting in it.
Use a sealant compatible with the flashing tape and the WRB. Some tapes will not bond over silicone; some sealants soften asphalt-based membranes. The manufacturer of the tape usually publishes a compatibility list. This is a real source of failures on jobs where the tape and the sealant were bought from whoever had them in stock.
Jamb tape goes on first, over the flange and onto the WRB, long enough to cover the top of the sill pan's end dams and to run above the top of the window flange. Roll it. Self-adhered flashing bonds with pressure, not with a palm; a J-roller or a firm hand roller is part of the kit.
Head tape goes on last, over the head flange, extending past both jamb tapes. Then the WRB head flap comes down over the head tape and the diagonal cuts get taped. If a drip cap is part of the spec, it sits on top of the flange or the trim, under the head tape or under the WRB flap, and drains onto the face of the window. It should never be taped on the outside of the wrap as an afterthought.
In cold weather, self-adhered flashings have application temperature limits. Check the roll. Some need a primer on OSB below a stated temperature, and some will not stick at all. A Minnesota January install with the wrong tape is a spring callback.
What goes in the gap on the inside?
The rough-opening gap is the last place air can get around the window, and on a new house with a blower-door test it shows up in the number. Two accepted fills: low-expansion window-and-door foam, applied in a single pass without packing the gap solid, or backer rod pushed into the gap with a sealant bead over it. High-expansion foam bows vinyl jambs and binds sashes; it is the wrong product.
Whichever fill, the air seal is the continuous bead between the frame and the interior finish (drywall return or jamb extension). Foam alone shrinks back from the frame over time. The interior seal also keeps warm indoor air from reaching the cold side of the assembly, which is where condensation and frost form inside the wall.
Check that the window still operates after foaming. A sash that drags after the foam cures means the jamb moved, and the fix is to cut out the foam, not to plane the sash.
Which sequencing mistakes cause callbacks?
From framing walk-throughs and from windows we have pulled out for other trades:
| Mistake | What happens | Fix on site |
|---|---|---|
| X-cut in the WRB | Head flaps drain into the framing. | Patch a new head flap over the opening before taping. |
| Head tape under jamb tape | Reverse lap at both top corners. | Strip and re-tape head over jambs. |
| No back dam in the pan | Water in the pan runs inward under the sill. | Add a wood dam and membrane, or an interior sealant dam before finish. |
| Sill flange sealed shut | Pan cannot weep; sill stays wet. | Cut the sealant at the sill; leave it open. |
| WRB flap never folded down | Head tape is exposed and the wrap laps behind it. | Fold, tape diagonals, roll. |
| High-expansion foam | Bowed jambs, sashes that drag, broken seals. | Cut out, refoam with low-expansion. |
| Tape not rolled | Edges lift in the first freeze. | Roll every inch, especially at corners. |
What does the code require?
The residential code's flashing section (R703.4 in the IRC, which Minnesota's residential code is built on) says flashing at exterior window and door openings is installed per the window manufacturer's installation and flashing instructions, or where those do not address the condition, per the flashing or WRB manufacturer's instructions. Pan flashing follows the same rule, and where the instructions are silent, pan flashing is installed at the sill of every exterior window and door opening. The pan has to be sealed or sloped to drain to the exterior finish or onto the WRB, and the opening also needs protection at the head and sides.
So the document to have on site is the window manufacturer's installation guide for that product line. Most of them read like the sequence above. When the field wants to deviate, the inspector's question will be which written instruction they were following.
What JMB Builders does
JMB Builders is a licensed Minnesota residential building contractor (BC809005) based in Zimmerman, working the Twin Cities metro with one crew. We set and flash windows for builders on a per-opening basis, following the manufacturer's instructions for the product on the job, and we photograph every opening before the siding goes on. Quote from your plans and a wall photo within one business day. Paid by check or direct deposit.
- New construction window installation crew for builders — jmbbuildersmn.com/services/builders/window-installation-crew-new-construction
- Install and trim-out partner for window companies — jmbbuildersmn.com/services/builders/window-company-trim-out-partner
- Interior window trim for new construction — jmbbuildersmn.com/services/finish-carpentry/new-construction-window-trim
- Drip cap installation above windows and doors — jmbbuildersmn.com/services/exterior-trim/drip-cap-installation
Frequently asked questions
What is the correct order to flash a window?
Sill pan first, then the window, then jamb flashing over the flange, then head flashing over the jambs, then the house wrap flap folded down over the head flashing. Every layer laps over the one below it so water always drains outward. The sill flange is left unsealed so the pan can drain.
Why should house wrap not be X-cut at a window?
The top two triangles of an X fold outward and, once the window is in, direct any water that gets behind the wrap above the window straight into the framing. The modified I-cut leaves one head flap that folds up during install and then folds down over the head flashing, so the wall above drains onto the window instead of behind it.
Does a window sill pan need a back dam?
Yes. The back dam is the raised inside edge that stops water in the pan from running inward under the window. ASTM E2112 calls for a back dam and end dams at least 2 inches high. Without it, a pan is just a sheet of flashing that moves the leak to the inside edge of the sill.
Should I use foam or backer rod around a new window?
Either works if it is done right. Low-expansion window-and-door foam applied in one light pass fills irregular gaps well. Backer rod with a sealant bead is the choice on wide or uniform gaps and is easier to remove if the window ever comes out. In both cases the actual air seal is the continuous sealant bead between the frame and the interior finish. Never use high-expansion foam; it bows jambs.
Can flashing tape be applied in cold weather?
Only within the temperature range printed on the roll. Many self-adhered flashings need a primer on OSB below a stated temperature, and some will not bond at all in deep cold. Cold-weather tapes exist and are worth stocking for Minnesota winter framing. Tape that goes on cold and unrolled is the tape that lifts in spring.
Does the building code require a sill pan under windows?
The IRC flashing section requires window flashing to follow the window manufacturer's instructions, and where those instructions do not address it, pan flashing at the sill of every exterior window and door opening. Since nearly every manufacturer's instructions include a sill pan, a pan is effectively required. The pan must be sealed or sloped to drain outward, and the head and sides also need flashing.